How to Trim Your Cat's Nails Without Getting Scratched (The Calm Way That Actually Works)
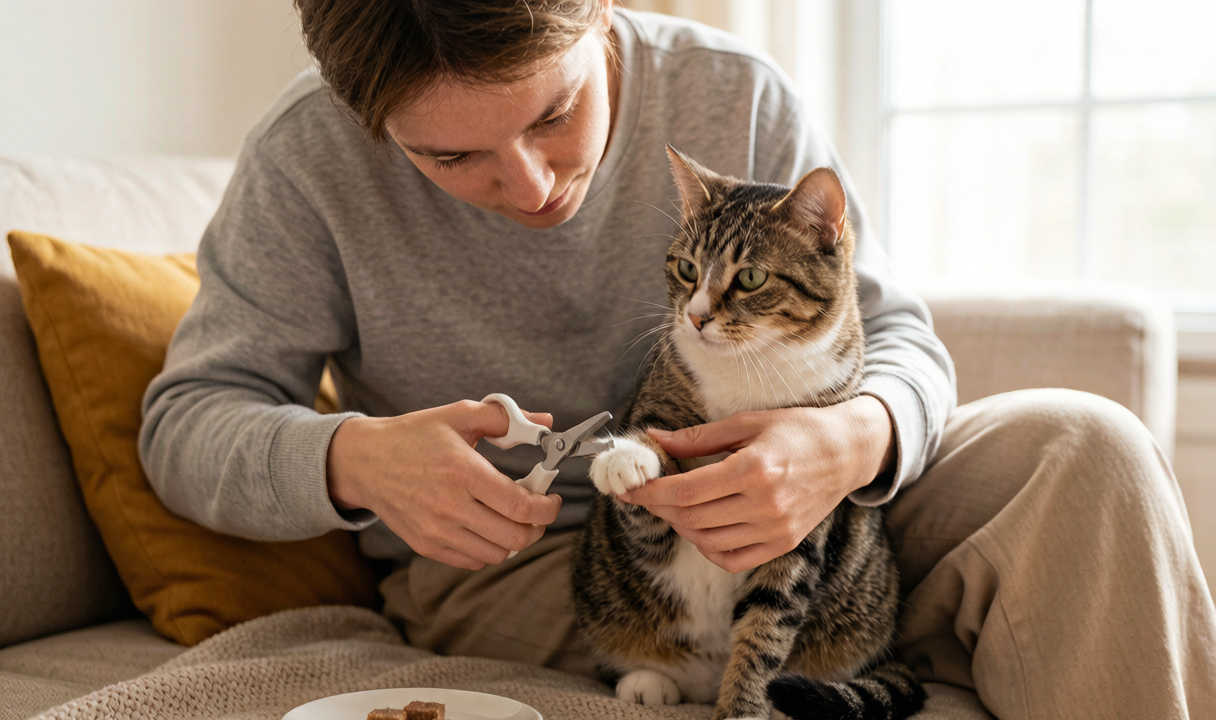
A first attempt at trimming a cat's nails often ends the same way: a few scratches on your forearm, a clipper flung across the room, and one very angry cat hiding under the couch for hours. Most tutorials make it look effortless — just grab the paw, press gently, and snip. What they rarely show is what happens when a cat absolutely refuses to cooperate.
It is tempting to give up entirely. But overgrown nails snag on blankets, carpet, and upholstery, and a cat that panics while stuck can twist a toe hard enough to hurt itself. Nail trimming isn't optional grooming — it's basic safety maintenance. The real question is how to do it without turning every session into a wrestling match.
There is an approach that works, and it relies on gradual conditioning rather than restraint. Done properly, most cats will sit calmly through a trim — not necessarily every nail in one session, but enough to keep them safe. Here's the process step by step, including the common mistakes worth skipping.
Why Cat Nail Trimming Matters More Than You Think
A common assumption is that indoor cats don't really need nail trims. After all, they don't climb trees or hunt prey, so a scratching post should keep things manageable, right? In practice, it usually doesn't.
Untrimmed nails curl inward toward the paw pads, and a nail left long enough can press into the skin between the toes. Overgrown nails also change how a cat distributes weight when walking, putting extra strain on the joints. For senior cats, that added strain can aggravate existing arthritis — a detail many owners only hear about during a routine checkup.
Indoor cats typically need trimming every 2 to 3 weeks. Kittens grow nails faster and may need weekly trims, while senior cats grow them slower but often don't wear them down as effectively because they're less active. A trim every 14 days is enough to keep most indoor cats' nails from ever getting dangerously long.
The Setup (This Is Where Most People Fail)
The most common mistake is trimming on the spur of the moment, whenever the nails happen to look sharp. Cats need predictability, and surprise nail trims feel like an ambush. Here's how to set things up instead:
Pick a consistent time. A weekend morning right after breakfast works well for most households, when a cat is sleepy and content. Cats are most relaxed after eating, and a regular schedule helps them anticipate the routine rather than fear it.
Choose a quiet space. A bedroom with the door closed works well, since there's no escape route and no distractions. Turn the TV off, keep other pets out of the room, and put a towel on your lap for grip. Some cats prefer sitting on a table; others settle best on a lap, facing away from you. Experiment with positions, but never force your cat onto their back if they resist it. That's fight-or-flight territory.
Gather everything before you bring the cat over. Keep the supplies together in a small basket: cat-specific nail clippers (scissor-style, not guillotine — most cats tolerate the scissor type better), styptic powder for emergencies, a bag of high-value treats such as freeze-dried salmon bits, and a towel. You absolutely cannot step away mid-session to grab something you forgot. That breaks the flow and gives your cat time to get anxious.
The clippers matter. Human nail clippers splinter cat nails — don't use them. Guillotine-style clippers require you to insert the nail into a hole, which many cats dislike. Scissor-style clippers with small curved blades let you position the cut quickly and cleanly, minimizing how long each nail is handled. A decent pair costs around $8 at most pet stores and will last for years.
The Three-Week Paw Conditioning Method (Do This Before You Ever Cut)
The reason most first attempts go badly: the cat was never taught that paw handling can be positive. Cats naturally protect their paws — they use them for balance, hunting, and self-defense. Grabbing a paw without conditioning feels like a threat.
Here's the conditioning routine to run for three weeks before the first real trim:
Week 1: Just touch the paws. While your cat is relaxing on your lap, gently stroke down each leg and briefly touch a paw pad for one second. Immediately follow with a treat, then go back to normal petting. Repeat 3 to 4 times per session, twice a day. By around day 5, most cats stop flinching when their paws are touched.
Week 2: Press the toe pads. Once your cat accepts paw touching, start pressing each toe pad gently to extend the nail — the same motion used during trimming. Again, one second of pressure, then a treat. The cat begins associating toe pressing with rewards instead of threat.
Week 3: Add the clippers visually. Put the clippers on your lap during regular cuddle sessions without using them. Most cats will sniff them, look them over, and eventually ignore them. Then press a toe pad, hold the clipper near the extended nail without cutting, and give a treat. This teaches your cat that the clipper near the nail is just another step in a reward sequence.
By the end of Week 3, a well-conditioned cat will stay on your lap voluntarily during paw handling. That's the signal you're ready for the first actual cut.
The Trim: Step by Step
Here's the actual trimming process, repeated every two weeks. The key rule: you don't have to finish all 18 nails in one sitting. Some sessions end after 4 or 5 nails because the cat gets twitchy. That's fine — note which nails are done and finish the rest a day or two later. Five calm nails are better than 18 stressful ones.
- Settle your cat on your lap, facing away from you. This position gives you access to both front paws and keeps your cat from watching the clippers approach, which triggers less defensive behavior.
- Take one front paw in your non-dominant hand. Wrap your hand around the paw gently — not gripping, just resting your fingers over it. Your thumb sits on top of the paw, your fingers underneath.
- Press the toe pad to extend the nail. Using your thumb, press the pad gently until the nail slides forward. This takes practice — pressing too hard is the usual beginner mistake, and it makes a cat pull the paw away. A light, steady press works best.
- Identify the safe cutting zone. On clear nails, you can see the pink quick inside — that's the blood vessel and nerve. Cut only the sharp curved tip beyond the quick, leaving at least 2 millimeters of clear nail between the cut and the pink. On dark nails, where the quick isn't visible, trim only the very tip — just the hooked end that curves downward. When in doubt, cut less. You can always trim a bit more next time.
- One smooth, quick cut. Position the scissor clippers perpendicular to the nail (cutting top-to-bottom, not side-to-side, which reduces splintering) and make one decisive snip. Hesitant, multiple small cuts crush the nail and hurt. One clean cut is fast and less uncomfortable.
- Immediate treat after each nail. Yes, each individual nail. It sounds excessive, but it keeps your cat in a positive state throughout the session. Keep the treats in a small bowl within reach and offer one right after each cut. Many cats start purring during trim sessions after about a month of this routine.
- Watch for stress signals. If your cat's ears go back, the tail starts twitching, the paw is pulled away repeatedly, or there's a growl — stop immediately. No "just one more nail." Stopping on a calm note preserves the positive association, and you can always come back tomorrow.
- Don't forget the dewclaws. The dewclaws are the small nails higher up on the inside of each front leg. They don't touch the ground and never wear down naturally, so they're the most likely to curl into the pad. Most cats have one dewclaw on each front leg, and it's often the longest nail on the paw. Trim the dewclaws first, since they matter most, and many cats tolerate them well.
What If You Cut the Quick?
Cutting the quick happens to almost everyone eventually, and it's nearly always on a dark nail where the pink line isn't visible. The cat yelps, a small drop of blood appears, and you feel terrible. Here's what to do:
- Don't panic. A quick cut hurts, but it's not a medical emergency. The bleeding stops on its own within 5 to 7 minutes for a small nick.
- Apply styptic powder immediately. Dip the bleeding nail tip into a small container of styptic powder (Kwik Stop is a widely available brand). It stops the bleeding within seconds. If you don't have styptic powder, cornstarch or flour works as a backup — press a small amount against the nail tip.
- Comfort your cat. After a quick cut, offer extra treats and a few minutes of petting before attempting any more nails. Often it's best to end the session right there — one mistake is enough to shake a cat's trust.
- Adjust the technique. Trimming dark nails under an LED headlamp makes the nail far easier to read. On truly opaque nails, make two to three tiny sequential cuts instead of one bigger one, checking after each mini-cut to make sure you haven't reached pink tissue.
When to Let the Pros Handle It
Some cats simply won't tolerate home nail trimming. A small number go into full defensive mode the moment clippers appear, and no amount of conditioning changes it. For cats like that, professional grooming or vet visits for nail trims are the safer option. Most vets do nail trims for $15 to $25, and it takes about 5 minutes with an experienced handler.
Professional help also makes sense for kittens under 8 weeks (their nails are too tiny to safely trim at home), cats with medical conditions that make handling painful, and any situation where you're so nervous that your anxiety transfers to the cat. Cats read our emotions — if you're dreading the trim, your cat will dread it too.
A Realistic Nail Trimming Schedule
Once the conditioning work is done, this is the routine worth settling into:
- Every 2 weeks: Trim front paw nails (including dewclaws) — about 10 nails total
- Every 3 to 4 weeks: Trim back paw nails — back nails generally grow slower and wear down more naturally
- Weekly: Check all nails visually, looking for curling, snagging on fabric, or nails that don't retract fully when your cat is relaxed
- Daily: Brush your cat (which keeps them desensitized to handling and gives you a chance to feel the paw pads for signs of ingrown nails)
A full trim session takes about 10 minutes once the routine is established, compared with the 45-minute battles most people start out with. The difference isn't better clippers or a magic technique. It's the three weeks of conditioning, the treat-after-every-nail approach, and the willingness to stop before your cat gets stressed.
If nail trims still feel like a battle, the conditioning method is worth the wait. Most cats need 2 to 4 weeks of practice before they'll tolerate a trim calmly, and consistency matters far more than speed.
Shop cat nail clippers on Amazon & Chewy
Comparing prices before you buy? Check current deals and read reviews from other pet owners.